|
Uploading files using Dreamweaver:
A site must be properly defined in
Dreamweaver 3 prior to uploading files. Refer to the Dreamweaver 3
manual for information on defining sites. 
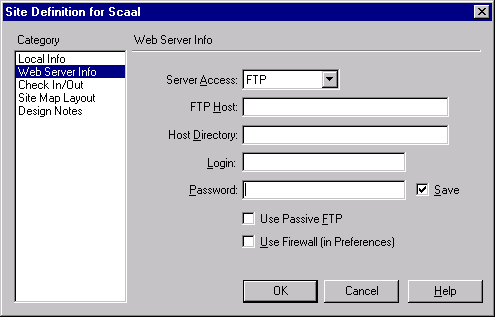
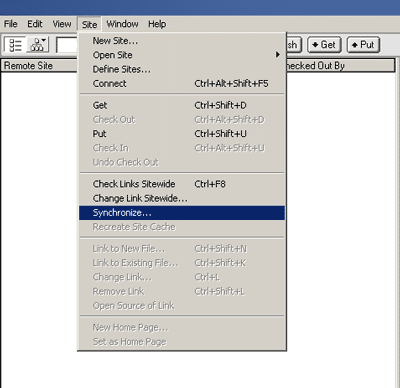
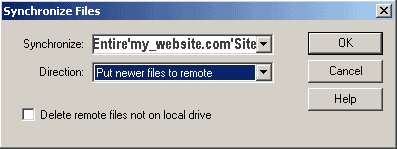
Enter the following information: Server Access: FTP. FTP Host: Your Domain Name or IP address (if your name is not registered or if you are transferring your Domain to our service, you may need to use the IP ADDRESS until the name is propagated throughout the different Domain Name Servers available on the Internet.) Host Directory: Enter public_html. Login: Enter your username (this is case-sensitive!.) Password: Enter your password. (The password is case-sensitive!.) Check the "Save" box if you don't want to have to keep entering your password every time. Click OK. Click Done. The following screen will appear: 

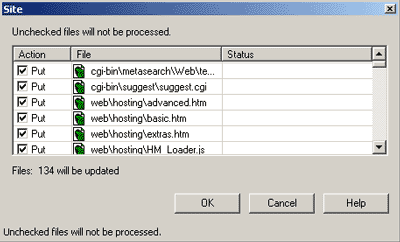
Click OK. The following box will appear: 
Check the boxes under "Action" that correspond to the files that you want to upload and click OK. Dreamweaver will now upload the files to your server. This can take several minutes depending on the amount and size of your files.
|
[ Go
Back ]